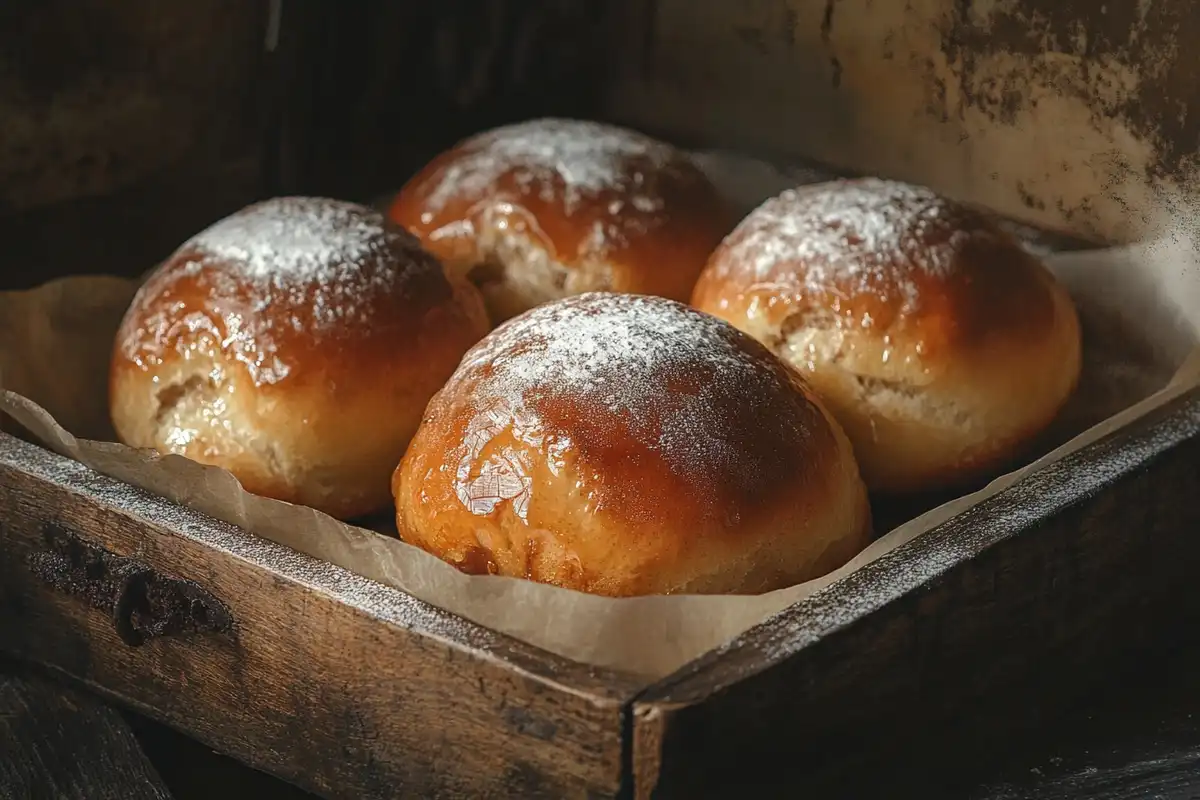
Discover the secrets to creating the perfect easy chocolate bun recipe with this step-by-step guide! Whether you’re a baking enthusiast or a curious beginner, this recipe promises irresistibly soft, fluffy buns filled with rich, gooey chocolate. From assembling the ingredients to the finishing touches, each section is crafted to guide you smoothly. Let’s dive in and transform simple ingredients into a delightful treat that’s perfect for breakfast, dessert, or a quick indulgence!
Introduction
Overview of Chocolate Buns
Soft, pillowy chocolate buns are more than just a baked good; they’re a heartfelt experience. Whether enjoyed warm with a cup of coffee or shared during special moments, these sweet treats hold a universal appeal. Their buttery dough, infused with a hint of sweetness and swirled with velvety chocolate, makes them an absolute favorite across cultures.
What Are Chocolate Buns?
Chocolate buns combine soft, sweet bread with luscious chocolate, creating a treat people often enjoy for dessert or breakfast. Rooted in traditional European pastries, these buns have transformed into various forms, such as chocolate-stuffed rolls, swirls, and twists. Bakers around the world celebrate their fluffy texture and the delightful chocolate surprise hidden inside. With each bite, the perfect balance of sweetness and richness keeps people coming back for more.
Popularity and Cultural Significance
Bakeries in France and cafes around the world proudly showcase chocolate buns, turning them into a go-to indulgence for many. These versatile treats seamlessly complement any occasion, whether it’s a casual breakfast or an elegant dessert spread. They blend simplicity with decadent flavors, creating a memorable experience that leaves everyone wanting more. To elevate their appeal, pair the buns with warm milk for comfort, soothing tea for relaxation, or refreshing fruity juice for balance. With so many options, they instantly become a crowd-pleaser, delighting both children and adults alike.
Why This Recipe Stands Out
Simplicity and Accessibility
This easy chocolate bun recipe breaks down the baking process, ensuring it stays simple and approachable for even novice bakers. Using readily available ingredients and clear, straightforward steps, this recipe lets anyone enjoy both the experience and the delicious results.
Rich Flavor Profile
The combination of a tender dough and the deep, creamy flavor of chocolate makes these buns truly irresistible. Plus, the recipe allows room for creativity, so you can add your favorite toppings or fillings!
Ingredients and Equipment
Ingredients Needed
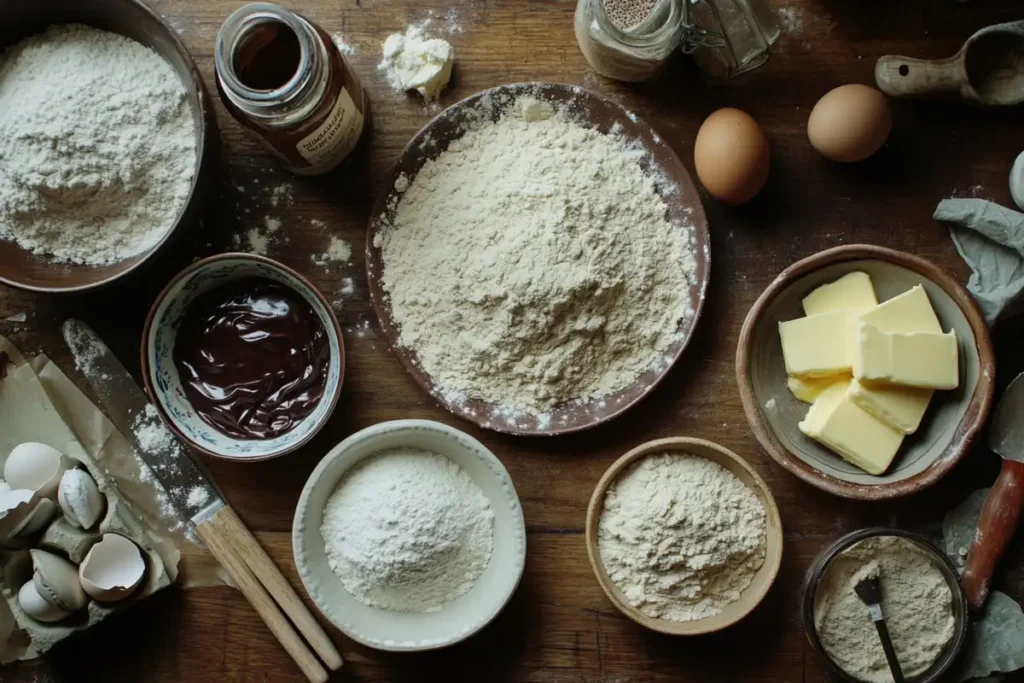
Crafting the perfect easy chocolate bun recipe begins with the right ingredients. Each element plays a crucial role in achieving the soft, fluffy texture and rich chocolate flavor that make these buns irresistible.
Dough
- Flour Types and Their Importance
The base of any great bun lies in its flour. Use all-purpose flour for an airy texture or bread flour for extra elasticity. The quality of the flour directly affects the dough’s structure, so opt for a trusted brand. - Yeast Selection
Yeast is the magic behind the buns’ rise. Instant yeast saves time and effort, while active dry yeast provides a more traditional approach. Always check its freshness for the best results. - Sweeteners and Flavorings
A touch of sugar not only sweetens the dough but also feeds the yeast. Add vanilla extract or a pinch of cinnamon for a subtle, delightful aroma.
Chocolate Filling
- Choosing the Right Chocolate
Use high-quality dark, semi-sweet, or milk chocolate for the filling. Chopped chocolate bars melt beautifully, creating those gooey layers you’ll love in every bite. - Additional Fillings (Optional)
Feel free to include nuts, such as chopped hazelnuts or almonds, for a crunchy contrast. Raisins or dried cranberries can add a unique twist too!
Glaze (Optional)
- Ingredients for a Shiny Finish
A simple glaze of milk and sugar or melted butter with honey can enhance the buns’ appearance. Want extra indulgence? Drizzle them with melted chocolate.
Essential Equipment
Having the right tools can turn an ordinary baking session into a smooth and enjoyable experience.
Mixing Tools
A sturdy mixing bowl and a wooden spoon are must-haves. For a quicker, smoother process, a stand mixer with a dough hook is invaluable.
Baking Pans and Their Impact
A good-quality, non-stick baking pan ensures even heat distribution, leading to perfectly baked buns. Alternatively, parchment paper can prevent sticking.
Measuring Instruments
Precise measurements are crucial in baking. Use a set of measuring cups and spoons, and if possible, a digital kitchen scale for accuracy.
Step-by-Step Preparation
Preparing the Dough
The foundation of any delicious easy chocolate bun recipe lies in a well-prepared dough. Follow these steps to achieve a soft, elastic base that’s perfect for trapping all that luscious chocolate.
Activating the Yeast
Start by dissolving your yeast in warm milk with a teaspoon of sugar. Ensure the milk is not too hot—around 110°F is ideal. Let it sit for 5–10 minutes until frothy. This step proves the yeast is alive and ready to work its magic.
Mixing and Kneading Techniques
In a large bowl, combine the flour, sugar, and a pinch of salt. Gradually add the activated yeast mixture, along with melted butter and a beaten egg. Stir until the dough starts to come together.
Transfer the dough to a floured surface and knead for about 8–10 minutes until smooth and elastic. If it feels sticky, sprinkle a little flour, but don’t overdo it—soft dough yields fluffier buns!
First Rise: Tips for Optimal Proofing
Place the dough in a greased bowl and cover it with a damp cloth. Let it rise in a warm spot for 1–2 hours or until doubled in size. Pro tip: If your kitchen is cool, preheat the oven to 200°F, turn it off, and place the bowl inside.
Preparing the Chocolate Filling
The chocolate filling is the heart of this recipe, and getting it just right makes all the difference.
Melting and Tempering Chocolate
If you’re using solid chocolate, chop it into small pieces and melt it gently using a double boiler or microwave in short bursts. Stir frequently to prevent burning.
Combining Ingredients for the Filling
Mix the melted chocolate with a bit of softened butter or cream for a smoother consistency. If you’re feeling adventurous, add a sprinkle of cinnamon or a drop of vanilla extract for a flavor twist.
Assembling the Buns
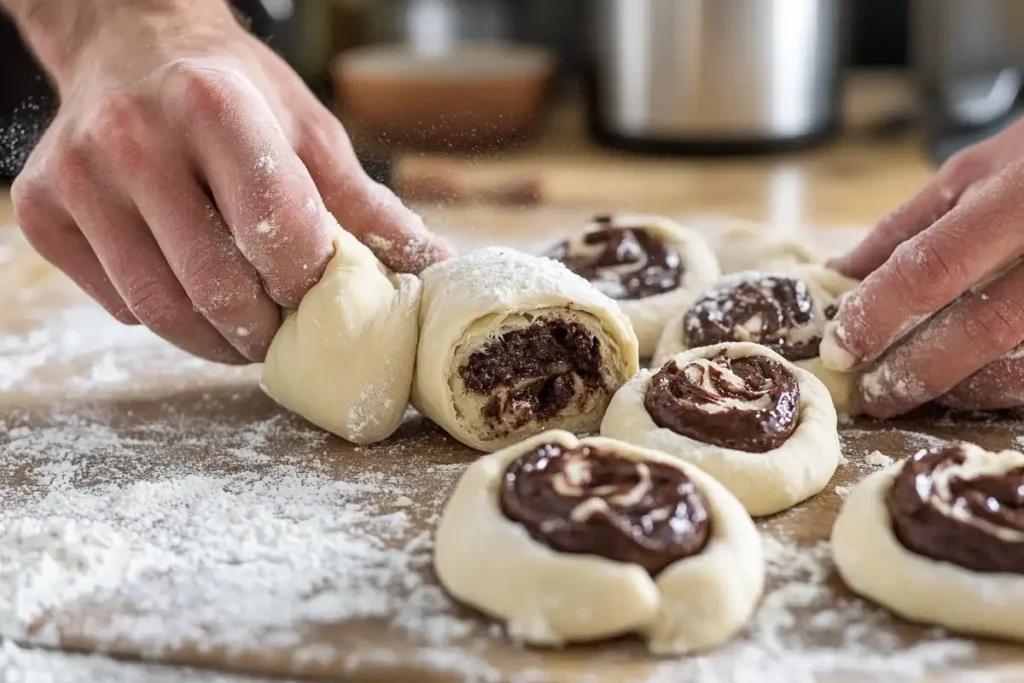
Now comes the fun part—assembling your chocolate buns!
Rolling Out the Dough
On a floured surface, roll out the risen dough into a large rectangle, about 1/4 inch thick. Ensure even thickness to avoid uneven baking.
Spreading the Filling Evenly
Spread the chocolate filling generously across the dough, leaving a small border around the edges to prevent spillage during rolling.
Shaping Techniques: Rolls, Twists, and Knots
Carefully roll the dough into a tight log. Slice it into even pieces with a sharp knife. Alternatively, you can twist sections of dough for a unique, braided look.
Final Proofing and Baking
The last steps before you enjoy your buns!
Second Rise: Ensuring Proper Expansion
Arrange the shaped buns on a greased baking tray, leaving enough space between them. Cover with a cloth and let them rise again for 30–45 minutes until puffy.
Baking Time and Temperature
Preheat your oven to 350°F (175°C). Bake the buns for 20–25 minutes until golden brown. The kitchen will fill with the aroma of freshly baked chocolate buns—divine!
Checking for Doneness
Tap the tops of the buns; they should sound slightly hollow. If in doubt, insert a toothpick—it should come out clean from the doughy parts.
Finishing Touches
Applying the Glaze
Adding a glaze to your easy chocolate bun recipe gives the buns a beautiful shine and enhances their flavor. While optional, it’s highly recommended for that bakery-perfect finish!
Preparing a Simple Sugar Glaze
To make a classic sugar glaze, mix powdered sugar with a few teaspoons of milk or water until smooth. Brush this mixture over the warm buns right after they come out of the oven. This locks in moisture and gives them a glossy sheen.
Alternative Glaze Options
If you want a richer glaze, melt some chocolate and drizzle it over the buns. For a subtler sweetness, brush them with honey or a light syrup. A dusting of powdered sugar can also add an elegant touch.
Serving Suggestions
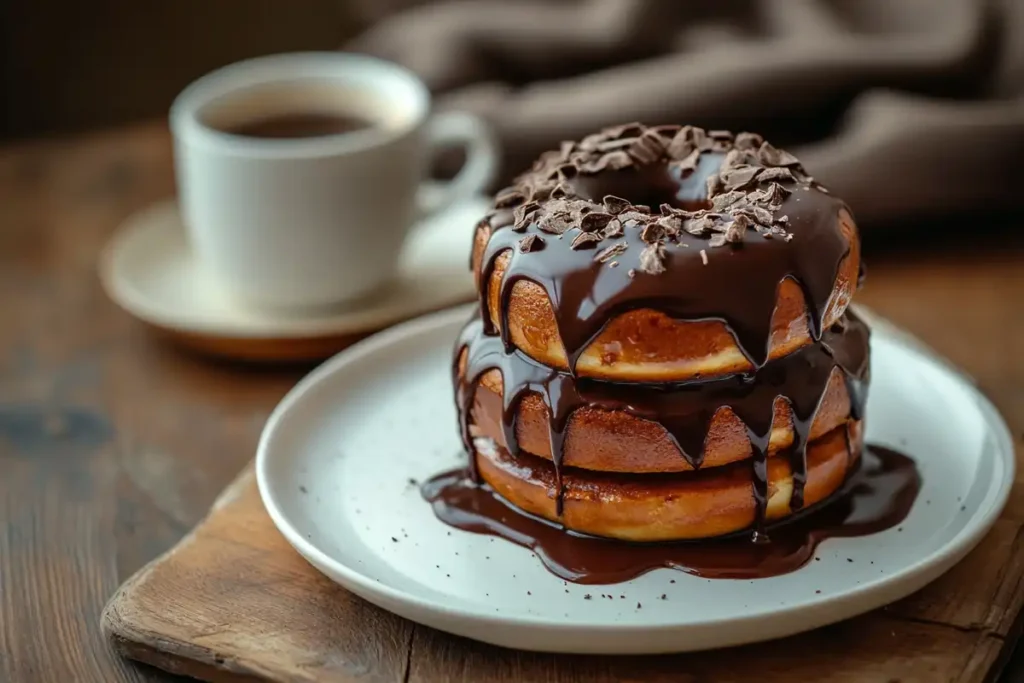
Presentation plays a key role in making these chocolate buns a hit. Here’s how to serve them in style.
Ideal Pairings (Beverages, Sides)
Pair these buns with a cup of hot coffee, creamy milk, or a soothing herbal tea. For breakfast, serve them alongside fresh fruit or yogurt. As a dessert, consider adding a dollop of whipped cream or a scoop of vanilla ice cream.
Presentation Tips
Arrange the buns on a white platter or a rustic wooden tray for a stunning display. Garnish with a sprinkle of cocoa powder or chopped nuts to elevate their look. If serving for a special occasion, tie a decorative ribbon around the tray for added charm.
Tips and Variations
Expert Tips for Perfect Chocolate Buns
Creating the ultimate easy chocolate bun recipe doesn’t have to be daunting! These expert tips will ensure your buns turn out soft, flavorful, and visually appealing every single time.
Common Mistakes to Avoid
- Overkneading the Dough: Knead just enough to achieve a smooth, elastic texture. Overworking can make the dough tough.
- Skipping the Proofing Time: Proofing allows the dough to develop structure and flavor. Be patient—it’s worth it!
- Overfilling the Buns: While tempting, too much filling can cause spillage during baking. Stick to a moderate amount for the best results.
Ensuring Even Baking
Place your buns evenly spaced on the tray to allow for proper air circulation. If your oven has hot spots, rotate the tray halfway through baking to prevent uneven browning.
Recipe Variations
Want to put your own twist on this easy chocolate bun recipe? Here are a few creative ideas to customize your buns and wow your taste buds.
Adding Nuts or Dried Fruits
Incorporate chopped hazelnuts, pecans, or walnuts into the filling for a delightful crunch. Alternatively, mix in dried cranberries or raisins for a touch of natural sweetness.
Using Different Types of Chocolate
Experiment with white chocolate for a creamy twist or dark chocolate for a more intense flavor. A combination of milk and dark chocolate creates a balanced taste profile.
Incorporating Spices for Enhanced Flavor
Add a pinch of cinnamon or cardamom to the dough for a warm, aromatic touch. Nutmeg and cloves can also complement the chocolate beautifully, especially during the holiday season.
Storage and Reheating
Proper Storage Methods
To keep your easy chocolate bun recipe as delicious as the day you baked it, proper storage is key. Here’s how to do it right.
Room Temperature vs. Refrigeration
For short-term storage, place the buns in an airtight container or wrap them tightly in plastic wrap. Keep them at room temperature for up to 2 days. Avoid leaving them exposed, as they may dry out quickly.
If you need to store them longer, refrigerate the buns in a sealed container for up to 5 days. Keep in mind that refrigeration can slightly harden the texture, so reheating is recommended.
Freezing for Extended Shelf Life
To enjoy your chocolate buns later, freeze them! Wrap each bun individually in plastic wrap and store them in a freezer-safe bag. They’ll stay fresh for up to 3 months. When you’re ready to enjoy, simply thaw them overnight in the fridge or at room temperature.
Reheating Instructions
Reheating is the best way to restore the soft, warm texture of your chocolate buns.
Maintaining Softness and Flavor
- Oven Method: Preheat your oven to 350°F (175°C). Wrap the buns in foil to retain moisture and heat for 8–10 minutes.
- Microwave Method: Place a bun on a microwave-safe plate and cover it with a damp paper towel. Heat in 15-second intervals until warm.
Both methods will make your chocolate buns taste like they’re fresh out of the oven!
With proper storage and reheating, you can savor these delightful buns anytime. In the next section, let’s break down the nutritional information so you can enjoy them guilt-free (or at least know what’s in them!).
Nutritional Information
Calorie and Macronutrient Breakdown
Understanding the nutritional profile of this easy chocolate bun recipe allows you to enjoy them mindfully. While these treats are indulgent, they can fit into a balanced diet when enjoyed in moderation.
Per Serving Analysis
Each chocolate bun (assuming the recipe makes 12 buns) contains approximately:
- Calories: 250–300
- Protein: 5–7 grams
- Carbohydrates: 30–35 grams
- Fats: 10–12 grams
- Fiber: 2–3 grams
These values may vary depending on the type and amount of chocolate, butter, and sugar used.
Tips for Reducing Calories
- Substitute some of the butter with unsweetened applesauce for fewer calories and added moisture.
- Use a sugar substitute or reduce the sugar in the dough without compromising the flavor.
- Opt for dark chocolate with a higher cocoa percentage to reduce sugar content and increase antioxidants.
Enjoying these buns as part of a balanced diet is entirely possible. They’re perfect for special occasions or as a weekend treat, so don’t hesitate to indulge!
Frequently Asked Questions (FAQs)
How to Eat Chocolate Hot Cross Buns?
Chocolate hot cross buns are best enjoyed warm, as the chocolate inside becomes gooey and delicious. Simply reheat them in the oven or microwave (see reheating tips above). For an extra indulgent experience, slather them with butter or a dollop of cream. They also pair wonderfully with a cup of coffee, tea, or a glass of milk.
What Is a Chocolate Bun Called?
Chocolate buns may go by different names depending on their origin or style. In some places, they’re referred to as chocolate brioche due to their buttery dough. Others might call them chocolate rolls, chocolate-stuffed buns, or even chocolate babka rolls. Despite the varied names, the essence remains the same: a soft, sweet bun filled with rich chocolate.
With these insights, you’re now fully equipped to bake, serve, and enjoy the perfect easy chocolate bun recipe! From the ingredients to the tips and storage solutions, this guide ensures your buns will be a hit every time.
Print
The Ultimate Easy Chocolate Bun Recipe for Soft, Fluffy Treats
- Total Time: 45 minutes
- Yield: 8–10 buns 1x
Description
Soft, fluffy, and irresistibly rich, these easy chocolate buns are a chocolate lover’s dream. Perfect for breakfast, a snack, or dessert, these buns are filled with gooey chocolate goodness and topped with a shiny glaze for that bakery-style finish. Whether you’re a seasoned baker or a beginner, this recipe is simple to follow and delivers delicious results every time.
Ingredients
For the Dough:
- 2 ¾ cups all-purpose flour
- ¼ cup granulated sugar
- 1 packet (2 ¼ tsp) instant yeast
- ½ tsp salt
- ¾ cup warm milk (110°F or 43°C)
- ¼ cup unsalted butter, melted
- 1 large egg
For the Filling:
- 1 cup semi-sweet chocolate chips or chopped chocolate
- 2 tbsp unsalted butter, softened
For the Egg Wash:
- 1 egg
- 1 tbsp milk
For the Glaze (Optional):
- ½ cup powdered sugar
- 1 tbsp cocoa powder
- 2–3 tbsp milk
Instructions
- Prepare the Dough:
- In a large mixing bowl, combine flour, sugar, yeast, and salt. Mix well.
- Add the warm milk, melted butter, and egg to the dry ingredients. Stir until a dough forms.
- Knead the dough on a lightly floured surface for 8-10 minutes until smooth and elastic. Alternatively, use a stand mixer with a dough hook for 5-7 minutes.
- First Rise:
- Place the dough in a greased bowl, cover with a clean kitchen towel, and let it rise in a warm place for 1-1.5 hours, or until doubled in size.
- Assemble the Buns:
- Punch down the risen dough and roll it out into a rectangle (approximately 12×10 inches).
- Spread the softened butter over the dough and sprinkle the chocolate evenly on top.
- Roll the dough tightly from one long side to the other, forming a log.
- Slice the log into 8-10 equal pieces and arrange them in a greased or parchment-lined baking dish.
- Second Rise:
- Cover the buns and let them rise again for 30-40 minutes, or until puffy.
- Bake:
- Preheat the oven to 350°F (175°C).
- Brush the buns with the egg wash (whisk the egg and milk together) and bake for 20-25 minutes, or until golden brown.
- Prepare the Glaze (Optional):
- In a small bowl, mix powdered sugar, cocoa powder, and milk until smooth. Adjust the consistency by adding more milk, 1 teaspoon at a time.
- Finish and Serve:
- Let the buns cool slightly before drizzling with the glaze. Serve warm and enjoy!
Notes
- You can substitute the filling with dark chocolate or a mix of chocolate chips and Nutella for a creamier texture.
- These buns taste best fresh but can be stored in an airtight container at room temperature for up to 2 days. Reheat before serving for a fresh-from-the-oven taste.
- Prep Time: 20 minutes
- Cook Time: 25 minutes
- Category: Breakfast/Dessert
- Method: Baking
- Cuisine: International
Nutrition
- Serving Size: A cup of fresh strawberries or a dollop of whipped cream
- Calories: 280
- Sugar: 14g
- Sodium: 120mg
- Fat: 12g
- Saturated Fat: 7g
- Unsaturated Fat: 4g
- Trans Fat: 0g
- Carbohydrates: 38g
- Fiber: 2g
- Protein: 5g
- Cholesterol: 40mg
Keywords: chocolate buns, easy baking, chocolate rolls, soft buns, chocolate dessert

